
This makes me happy.
How full is your heart?


Your interest The Myers Briggs personality test is something I bring up every so often in my blog. The post about the brain character quiz peaked the interest to know my Myers Briggs type. In the spirit of embracing my personality, I am sharing my {read more}
Welcome back fam! I’m going to get straight to the point: for the longest time I forced myself to be someone I wasn’t. Instead of embracing the delicate, soft parts of myself; I showed the world only my thorns.
Randomly finding this little quiz on Instagram, I thought the results were interesting enough to share. For those of you who have known me for a long time, the results may be surprising. However, I do see truth in them, and that is why I wanted to share with you today!
Through the conditioning of society and I suppose the examples around me, I became a version of myself I didn’t even recognize. This version of myself put value in the “hustle” culture and felt better only when constantly achieving. While there are positive attributes to a sense of urgency and pushing yourself; finding authenticity (I now realize) is much more important.
After years of sacrificing the places and things that truly made me happy in search for achievement; I have finally learned to embrace my authentic self. To be honest, as I write this, I couldn’t even tell you what the heck I was exactly ‘searching’ for. It is sad to realize how far I’ve strayed away from who I really am for what I don’t even know!
But, I’m not a dweller in self-pity or regret, so let’s get to the happy part of this post! This is for anyone regardless of how far you feel apart from who you truly are. Maybe you have never strayed from who yourself or you might feel comfortable expressing your true feelings; or maybe you are on the path back to yourself. Along the journey is is important to check-in with the reflection in the mirror.
Whether it be the Myers Briggs or an online quiz, I don’t put too much stock in them, however I do believe it is a way to explore who you are. In any of these personality type tests, it is fun to determine how close to reality you think it is, and discuss it with others. In fact, I’d love your feedback on how this quiz rated me versus your perception of me!
First, if you want to take the quiz, the link is below. It oddly starts out at 11% … I tried to figure out if I was missing the first question, but from everything I could tell it just starts out not at 0%?
There are four potential results to the quiz:
The person who created this quiz, Dr. Jill Bolte Taylor, is a neuroscientist. In 1996 she experienced a severe hemorrhage in the left hemisphere of her brain causing her to lose the ability to walk, talk, read, write, or recall any of her life. Her memoir, My Stroke of Insight, documenting her experience with stroke and eight-year recovery, spent 63 weeks on the New York Times nonfiction bestseller list and is still routinely the #1 book about stroke on Amazon. In 2008, Dr. Jill was chosen as one of Time magazine’s “100 Most Influential People in the World” and was the premiere guest on Oprah Winfrey’s “Soul Series” webcast.

My results were not a surprise to me. If I had taken this same quiz even 3 years ago I would have been a little more surprised, and 10 years ago I would have said absolutely not. It just goes to show how much a person can change, and be more authentic!
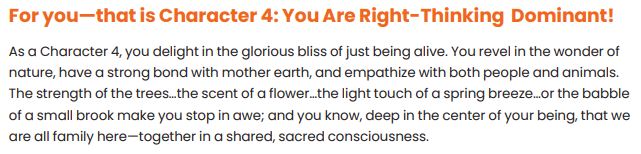
Sadly, there was a time when I would have scoffed at the softness this description evokes. A time when I would have denied this description of myself and acted tough and cold on the exterior. How silly it was to deny who I really am.
Funny enough though, as far back as I can remember I was bouncing around with my dog outside, enjoying the sights and sounds of the odd acreage where we lived. Always exploring and seeking peace, even when I lived in Philadelphia. I used to sit outside the Philadelphia Art Museum in the gazebo which used to be part of the old waterworks and watch the Schuylkill River flow past.
With a forever longing to be still and at peace, but not allowing myself these two things could occur at the same time; my life was a jumble of striving for something that doesn’t exist. Granted I would find flow in the mindfulness of horseback riding. In a way I suppose that was the first activity where I learned the calmness of confidence and assuredness of small moments. It wasn’t until a few bone breaks requiring me to be still for long periods that I learned the peace of just breathing. Taking in the nature I could see through the window and enjoying memories of experiences past.
Thankfully today, I can say I embrace this as who I am. I love my body, my soul and the beautiful earth we live on. The universe fascinates me and I revel in the beauty of the birds and flowers. Sometimes I find myself observing a tree for long periods of time and just being so thankful for its shade, sturdiness and ability to give us oxygen. I’ll admit now that I hug my huggable plants and tell the others how gorgeous they are before sleeping.
If you decide to take the quiz, I’d love to hear if you agree with the results! If you know me in person, please let me know if my results are something you agree with. And, if you are open to sharing… is there a part of your authentic self that you push down or keep hidden from others (like I used to?)?
I can’t wait to hear from you all!

The first of a new blog series: seven days of yoga! Here is my experience taking an online 7 day yoga beginners class.

Decision making should be based on a person’s own choice, not the voices and opinions of others. When making decisions that align with our values and dreams, we gain self-respect.
Hello everyone! Welcome to today’s post! Today is going to be a bit different than most of the posts so far! However, if you like this sort of thing, let me know down below and I will do more!
Since this blog touts trying new things, and learning; I wanted to share with you a simple sewing tutorial. Although pillow covers weren’t my first finished sewing product, they quickly became a favorite. So, today we will do pillow covers in an envelope style – which means no zippers! (Que the yayayyaa sound).
Perhaps you really do want to try something complete new, or maybe you’d like to make homemade gifts this year. Or maybe, you are like me and actually wanted to change the fabric on the pillows which came with your outdoor furniture). The patio set I purchased mid-pandemic for my balcony space can be found on my 2021 favorites.
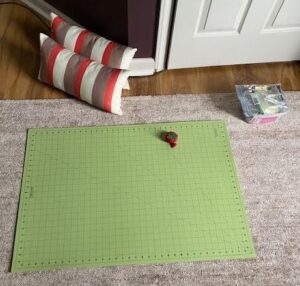
No matter the reason you are here, I do hope you give this a try and find it fun! Let’s get into it!
If this is your first time sewing, take your time. Throughout my sewing years, rushing has never ever helped me. This should be enjoyable, not to mention taking your time will allow for correct measurements! Since it had been awhile since I’d sewed, this took me about an hour from start to finish. I enjoy sewing and tend to double check my work regularly.
Select the pillows you’d like to cover and measure. For this particular project, I already had pillows, I just wanted to switch the fabric for something that matched my outdoor rug. You can also purchase pillows at your local craft store.
My pillows are 18 inches wide by 10 inches high.
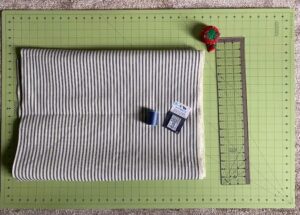
Select fabric and thread colors. This is fun for some, stressful for others, especially as more and more fabric stores are closing. You will want to be mindful of where the pillow will spend most of its time. If outside, be sure to get a fabric that is either waterproof or meant to be outside, some are even anti-fade! If the pillow will be used frequently, you will want to select fabric that will not wear easily. I tend to use a different thread on my bobbin vs on my spool – this is total preference. *Please note: be sure to match your thread with the fabric type (as not all thread is strong enough for thicker fabric). In addition, be sure to have the correct needle type for your fabric! Needles can and DO break (this is based off personal experience).
For my pillows, which will be outside, I selected an outdoor striped fabric. The thread is meant for denim which I knew would be suitable and I made sure I was using the right type of needle.
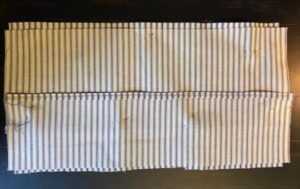
In this step, you will end up with 3 pieces per pillow. One piece for the face of the pillow, and two pieces in two different lengths for the envelope affect (typically goes in the back, unless you decide to apply buttons or other cute accessories). Add an inch to each piece for the seam allowance. In general, you will want about 3 inches overlapping on the back of the pillow.
For example, for each of my 18×10 pillow, I cut the following three pieces:
Now, iron fabric and fold down envelop pieces so that there won’t be a raw edge showing. A suggestion: fold over a quarter of an inch, iron it. And then, fold over another quarter of an inch, iron and then take it over to the machine for sewing and pinning.
Double stitch hem (this is total preference on the look and ‘finish’). Typically I don’t pin the hem. Instead, simply use a high heat during the ironing step. Which, ensures its crisp. While sewing, guide through the machine slowly, back stitching on the ends a tad.
Alight! It’s time to pin the pillow case fabric together. With the right side of the fabric facing each other, line up fabric and pin. A word of advice: be sure to put a few pins through all 3 pieces of fabric. Because, the fabric may move as you are sewing the edges, the pins through all three keep it much more stable.
Btw, I noticed while editing this post how sloppy my pinning looks below, but still wanted to post. I had some trouble with measurements as well and first piece was an inch too big (so I cut it 20 instead of 19 :-p) I ended up cutting off the extra!
Finally, it’s time to sew your pieces all together! Typically, I do one final check and make sure the right sides are facing one another, be sure I’m happy with the way the fabric is lining up. And, I also do a measure to make sure I have enough allowance to do a 1/2″ all the way around. (Remember when we added an inch to the measurement? This is so we would have 1/2″ seam. On your machine itself, check to be sure your bobbin has enough thread to go all the way around and that all is well. Once you’ve done your final checks and measurements, sew together the pieces!
Tip: backstitch over the envelop closures for extra support (this helps with the pillow is uses and in the wash too!)
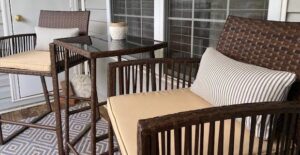
Take your pins out if you haven’t already! Some people iron open the seams for a smoother look – this is completely optional. AND then, turn your cases so the right side is facing out, and now stuff them with your pillows!
Enjoy!
Hopefully this tutorial was clear and easy to follow. Please let me know if you complete this project, you can always tag us on Instragram @brighteyedsmiles.
Also, if you’d like me to make you pillow covers using this method, I would be more than happy to do so! Right a comment below, or DM me on Instagram 🙂

Remember being in grammar school and being taught “STOP. DROP. and ROLL.”? This was a safety technique taught to us in the case of our clothes catching on fire. It calls for us to stop (basically don’t panic), drop to the ground, and roll so {read more}