
Simple sewing tutorial
Hello everyone! Welcome to today’s post! Today is going to be a bit different than most of the posts so far! However, if you like this sort of thing, let me know down below and I will do more!
Since this blog touts trying new things, and learning; I wanted to share with you a simple sewing tutorial. Although pillow covers weren’t my first finished sewing product, they quickly became a favorite. So, today we will do pillow covers in an envelope style – which means no zippers! (Que the yayayyaa sound).
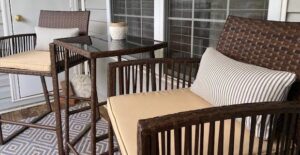
Perhaps you really do want to try something complete new, or maybe you’d like to make homemade gifts this year. Or maybe, you are like me and actually wanted to change the fabric on the pillows which came with your outdoor furniture). The patio set I purchased mid-pandemic for my balcony space can be found on my 2021 favorites.
No matter the reason you are here, I do hope you give this a try and find it fun! Let’s get into it!
Tutorial
If this is your first time sewing, take your time. Throughout my sewing years, rushing has never ever helped me. This should be enjoyable, not to mention taking your time will allow for correct measurements! Since it had been awhile since I’d sewed, this took me about an hour from start to finish. I enjoy sewing and tend to double check my work regularly.
Things you’ll need:
- Sewing machine
- Scissors meant for fabric
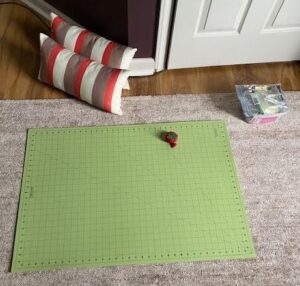
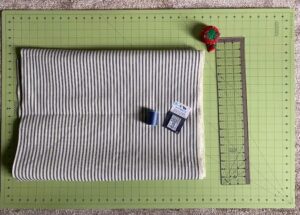
- Measuring device (I have a mat and a ruler)
- Sewing pins
- Fabric and thread
- Iron and ironing board
- Sewing chalk is helpful but not needed
Step 1: Select and Measure
Select the pillows you’d like to cover and measure. For this particular project, I already had pillows, I just wanted to switch the fabric for something that matched my outdoor rug. You can also purchase pillows at your local craft store.
My pillows are 18 inches wide by 10 inches high.
Step 2: Style
Select fabric and thread colors. This is fun for some, stressful for others, especially as more and more fabric stores are closing. You will want to be mindful of where the pillow will spend most of its time. If outside, be sure to get a fabric that is either waterproof or meant to be outside, some are even anti-fade! If the pillow will be used frequently, you will want to select fabric that will not wear easily. I tend to use a different thread on my bobbin vs on my spool – this is total preference. *Please note: be sure to match your thread with the fabric type (as not all thread is strong enough for thicker fabric). In addition, be sure to have the correct needle type for your fabric! Needles can and DO break (this is based off personal experience).
For my pillows, which will be outside, I selected an outdoor striped fabric. The thread is meant for denim which I knew would be suitable and I made sure I was using the right type of needle.
Step 3: Measure & Cut
In this step, you will end up with 3 pieces per pillow. One piece for the face of the pillow, and two pieces in two different lengths for the envelope affect (typically goes in the back, unless you decide to apply buttons or other cute accessories). Add an inch to each piece for the seam allowance. In general, you will want about 3 inches overlapping on the back of the pillow.
For example, for each of my 18×10 pillow, I cut the following three pieces:
- Front: 19 x 11
- Bottom Envelope: 19 x 8
- Top Envelope: 19 x 6
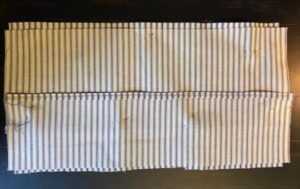
Step 4: Iron
Now, iron fabric and fold down envelop pieces so that there won’t be a raw edge showing. A suggestion: fold over a quarter of an inch, iron it. And then, fold over another quarter of an inch, iron and then take it over to the machine for sewing and pinning.
Step 5: Hem raw edge
Double stitch hem (this is total preference on the look and ‘finish’). Typically I don’t pin the hem. Instead, simply use a high heat during the ironing step. Which, ensures its crisp. While sewing, guide through the machine slowly, back stitching on the ends a tad.
Step 6: Pin
Alight! It’s time to pin the pillow case fabric together. With the right side of the fabric facing each other, line up fabric and pin. A word of advice: be sure to put a few pins through all 3 pieces of fabric. Because, the fabric may move as you are sewing the edges, the pins through all three keep it much more stable.
Btw, I noticed while editing this post how sloppy my pinning looks below, but still wanted to post. I had some trouble with measurements as well and first piece was an inch too big (so I cut it 20 instead of 19 :-p) I ended up cutting off the extra!
Step 7: Sew
Finally, it’s time to sew your pieces all together! Typically, I do one final check and make sure the right sides are facing one another, be sure I’m happy with the way the fabric is lining up. And, I also do a measure to make sure I have enough allowance to do a 1/2″ all the way around. (Remember when we added an inch to the measurement? This is so we would have 1/2″ seam. On your machine itself, check to be sure your bobbin has enough thread to go all the way around and that all is well. Once you’ve done your final checks and measurements, sew together the pieces!
Tip: backstitch over the envelop closures for extra support (this helps with the pillow is uses and in the wash too!)
Step 8: Stuff
Take your pins out if you haven’t already! Some people iron open the seams for a smoother look – this is completely optional. AND then, turn your cases so the right side is facing out, and now stuff them with your pillows!
Enjoy!
Hopefully this tutorial was clear and easy to follow. Please let me know if you complete this project, you can always tag us on Instragram @brighteyedsmiles.
Also, if you’d like me to make you pillow covers using this method, I would be more than happy to do so! Right a comment below, or DM me on Instagram 🙂